Getting Started
UI Toolkit (formerly UI Elements) is Unity’s new UI system that can be used as an alternative to IMGUI (editor UI) and UIGUI (runtime UI).
UI Toolkit is still in preview, so some of the screenshots in this tutorial are likely to change as new releases occur.
Download the project files
This tutorial relies on scripts and models that are included in the starter project. You can download the starter project by:
- Clone and/or download the GitHub repository.
- Navigate to the Animate-runtime-progress-bars-UI-Toolkit\projects\starterProject folder in Unity.
You will see Animations, Fonts, Models, Scenes, Scripts and a Sprites folder in Assets/WUG.
Install UI Toolkit for runtime & UI Builder
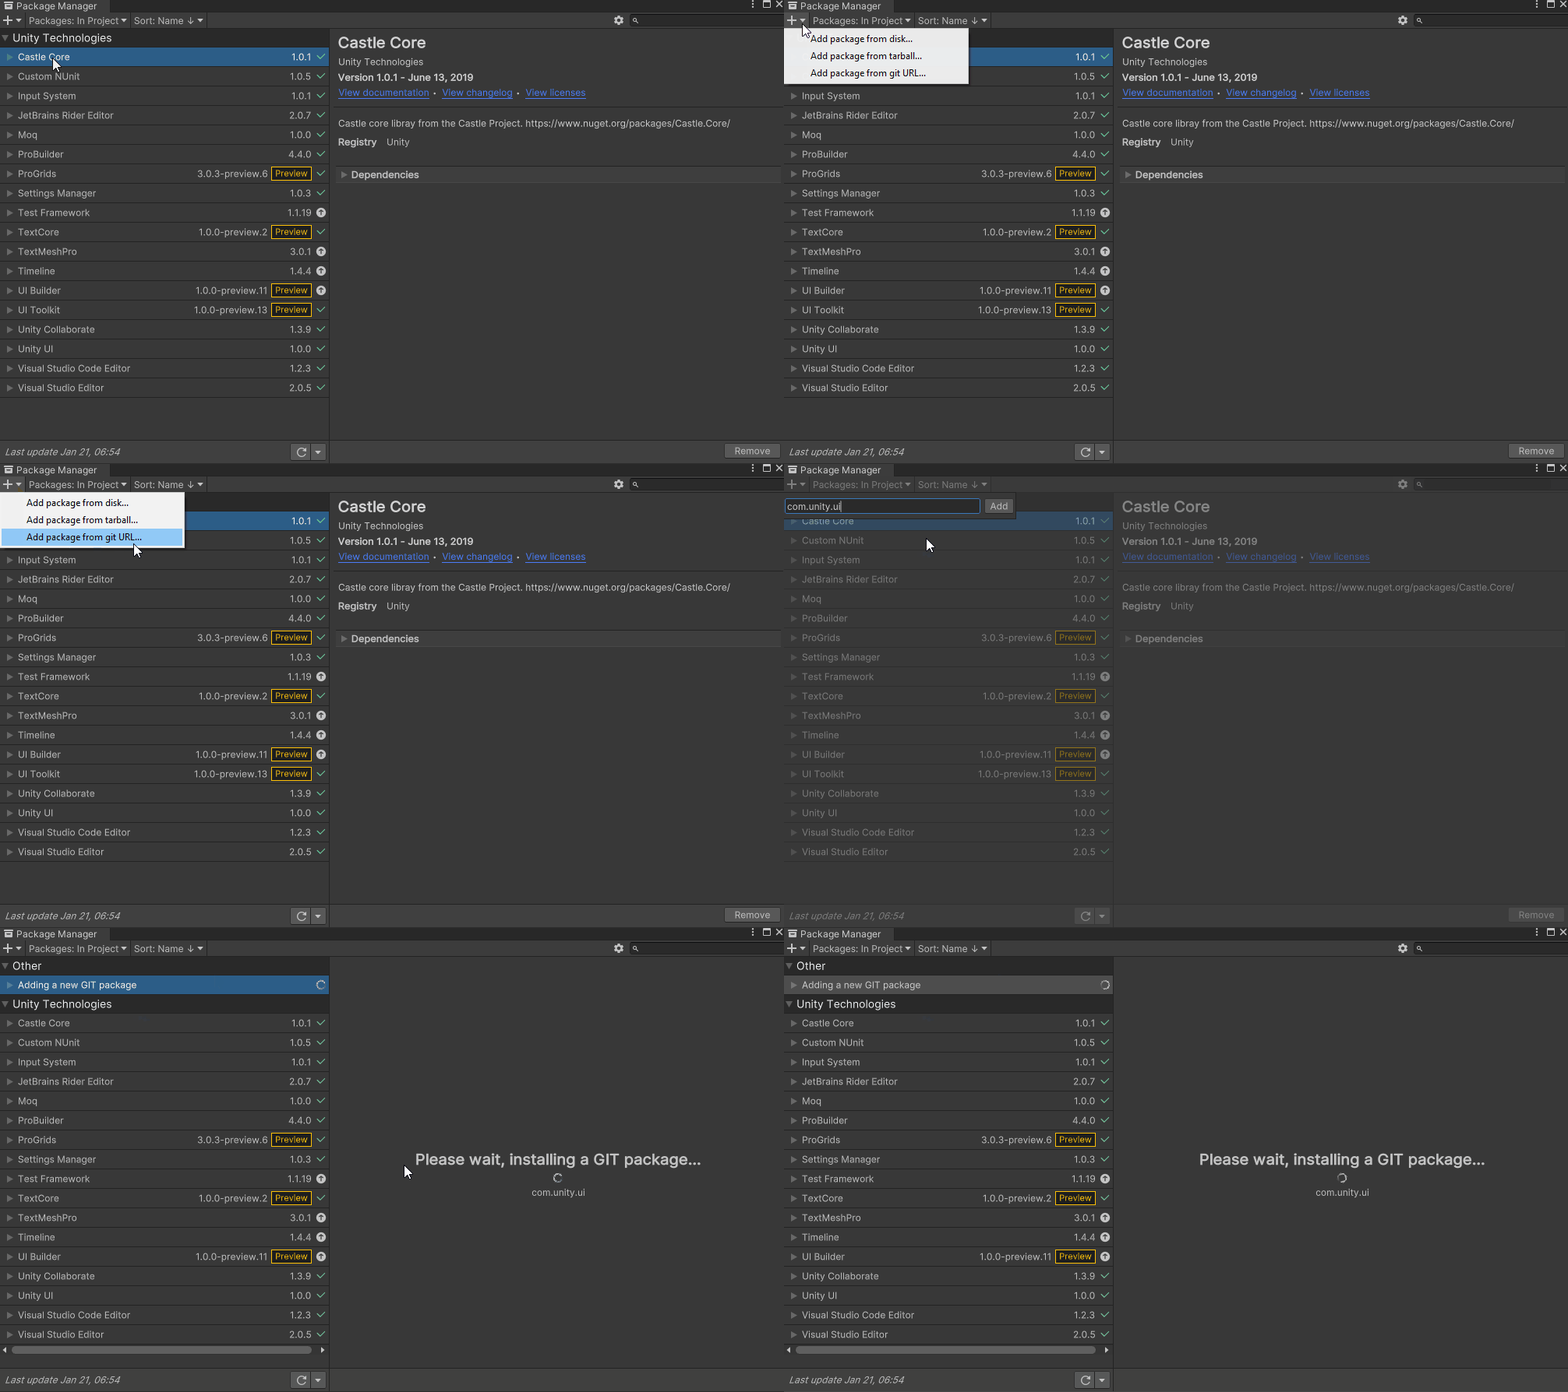
UI Toolkit is now shipped via the Unity Editor. However, the features that are needed to use UI Toolkit at runtime require the installation of the latest package. Since the package is not discoverable in the editor, you will need to add it by doing the following:
- Go to Window > Package Manager.
- Click on the + button and choose Add Package from git URL.
- Enter the following URL: com.unity.ui.

You will need to install UI Builder if you are on an editor version earlier than 2021.1:
- First make sure Preview Packages is turned on by going to Project Settings > Package Manager. Check Enable Preview Packages under the Advanced Settings section.
- Back in Package Manager, search for UI Builder and click Install.
As of the writing of this tutorial, there is a bug when first installing the UI Toolkit package that requires you to restart Unity. You will know that this still applies if you get a series of console errors after installing.
Install DOTween
DOTween is an awesome tool that you can use to script animations using C#. It supports just about anything, or at least anything I have tried to animate. :D DOTween was created by Demigiant and is available on the Unity Asset Store. There is a free version and a pro version, which comes with extra features including a visual editor. This project will use the free version. Install it by:
- Navigate to the DOTween Asset Store page and login.
- Click the Add to My Assets button.
- In the Unity Editor, open Package Manager and change the Package filter from Unity Registry to My Assets.
- Select DoTween (HOTween v2) and click Install.

Once installed, DoTween will pop up a wizard that will guide you through setting it up in your project. The most important thing to do is click on the Setup DOTween… button, leave all of the modules unchecked, and click apply.