Code the Inventory Slots
I’ve found that UI Builder isn’t always the right approach for creating my VisualElements. Most of the time I end up building the assets via C# code to keep things clean. For the InventorySlot, let’s skip the UI Builder and instead create them via C#.
You can also code the UXML file directly. You can read more about that method here.
InventorySlot will consist of two elements for it’s hierarchy - the root (which is a VisualElement) and a child that is an Image. The image will only have a sprite if the slot has an item. Here’s what it’ll look like:

Create a new script called InventorySlot. Have it inherit from VisualElement and add the following code:
public class InventorySlot : VisualElement
{
    public Image Icon;
    public string ItemGuid = "";

    public InventorySlot()
    {
        //Create a new Image element and add it to the root
        Icon = new Image();
        Add(Icon);

        //Add USS style properties to the elements
        Icon.AddToClassList("slotIcon");
        AddToClassList("slotContainer");
    }
}
When the InventorySlot is first instantiated, it’ll create a new Image element and add it as a child to the root. Next, it adds two new styles - slotContainer and slotIcon. These styles do not exist though, so now would be a good time to add them. Open the Inventory.uss stylesheet and add the following classes to the end:
.slotContainer {
    width: 128px;
    height: 128px;
    margin: 5px;
    border-left-color: rgb(48, 48, 48);
    border-right-color: rgb(48, 48, 48);
    border-top-color: rgb(48, 48, 48);
    border-bottom-color: rgb(48, 48, 48);
    background-color: rgb(9, 19, 21);
    background-image: url('/Assets/WUG/Sprites/ItemSlotBackground.png');
    border-top-left-radius: 3px;
    border-bottom-left-radius: 3px;
    border-top-right-radius: 3px;
    border-bottom-right-radius: 3px;
}

.slotIcon {
    padding: 15px;
    flex-shrink: 0;
    flex-grow: 1;
}
.slotContainerwill be a 128x128 square with ItemSlotBackground.png set to thebackground-image. Setting theborder-radiusto 3px will give it slightly rounded corners. Finally,marginwill add some space between all of theInventorySlots..slotIconusesflex-growto ensure that it fills up all available space but then applies apaddingof 4px to make sure it’s slightly smaller than the parent.
You need to have each slot instantiated before you can see InventorySlot in action. Create another class called InventoryUIController. Have it inherit from MonoBehaviour and add the following code:
public List<InventorySlot> InventoryItems = new List<InventorySlot>();

private VisualElement m_Root;
private VisualElement m_SlotContainer;

private void Awake()
{
    //Store the root from the UI Document component
    m_Root = GetComponent<UIDocument>().rootVisualElement;

    //Search the root for the SlotContainer Visual Element
    m_SlotContainer = m_Root.Q<VisualElement>("SlotContainer");

    //Create InventorySlots and add them as children to the SlotContainer
    for (int i = 0; i < 20; i++)
    {
        InventorySlot item = new InventorySlot();

        InventoryItems.Add(item);

        m_SlotContainer.Add(item);
    }
}
Every UI Document component has a root Visual Element, which is stored in m_Root for easy access later. You can use either Q or Query to search for a specific element within the hierarchy. Providing either the type or the name is optional. In other words, these two lines accomplish the same thing for the Inventory UI:
//Option 1:
m_SlotContainer = m_Root.Q<VisualElement>("SlotContainer");

//Option 2:
m_SlotContainer = m_Root.Query("SlotContainer");
You can return the first result of the query by appending .First() at the end and the last by appending .Last(). For example: m_SlotContainer = m_Root.Query("SlotContainer").First();
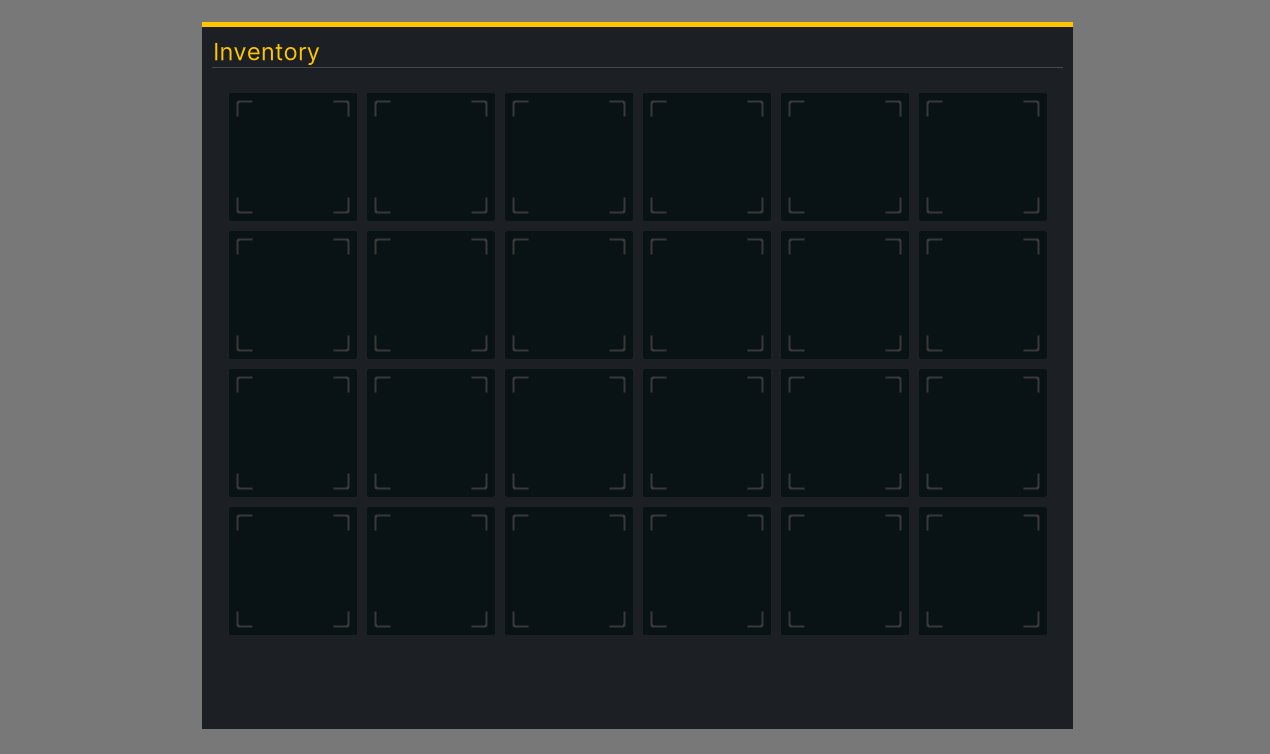
Add InventoryUIController as a component to the UserInterface GameObject and push Play. You should see this:
Creating Templates
What’s really cool about UI Toolkit is the reusability. You’ve seen this a bit with styles, and it can also be done by creating custom controls in C# that you can still use in UI Builder. To do this, add the following code to the end of your InventorySlot class:
#region UXML
[Preserve]
public new class UxmlFactory : UxmlFactory<InventorySlot, UxmlTraits> { }

[Preserve]
public new class UxmlTraits : VisualElement.UxmlTraits { }
#endregion
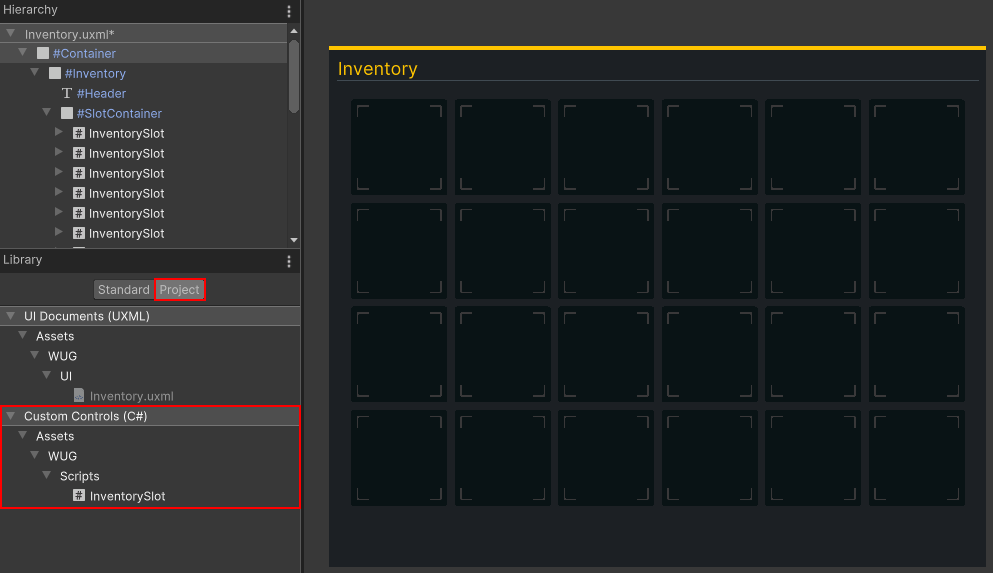
Open UI Builder and click on the Project tab under the Library section. InventorySlot should now be an option under the Custom Controls (C#) section. Drag and drop InventorySlot as a child under SlotContainer.
Be sure to delete your loop in the InventoryUIController class if you decide to instead add your slots via UI Builder. I’ll leave the loop in for this tutorial.