Design the Inventory UI
UI Builder is a way to visually create and edit UXML and USS files. It is also highly useful if you are creating your assets via code and want to mockup how something might look or to see what the proper syntax is for a style variable. Open the window by going to Window > UI Toolkit > UI Builder.
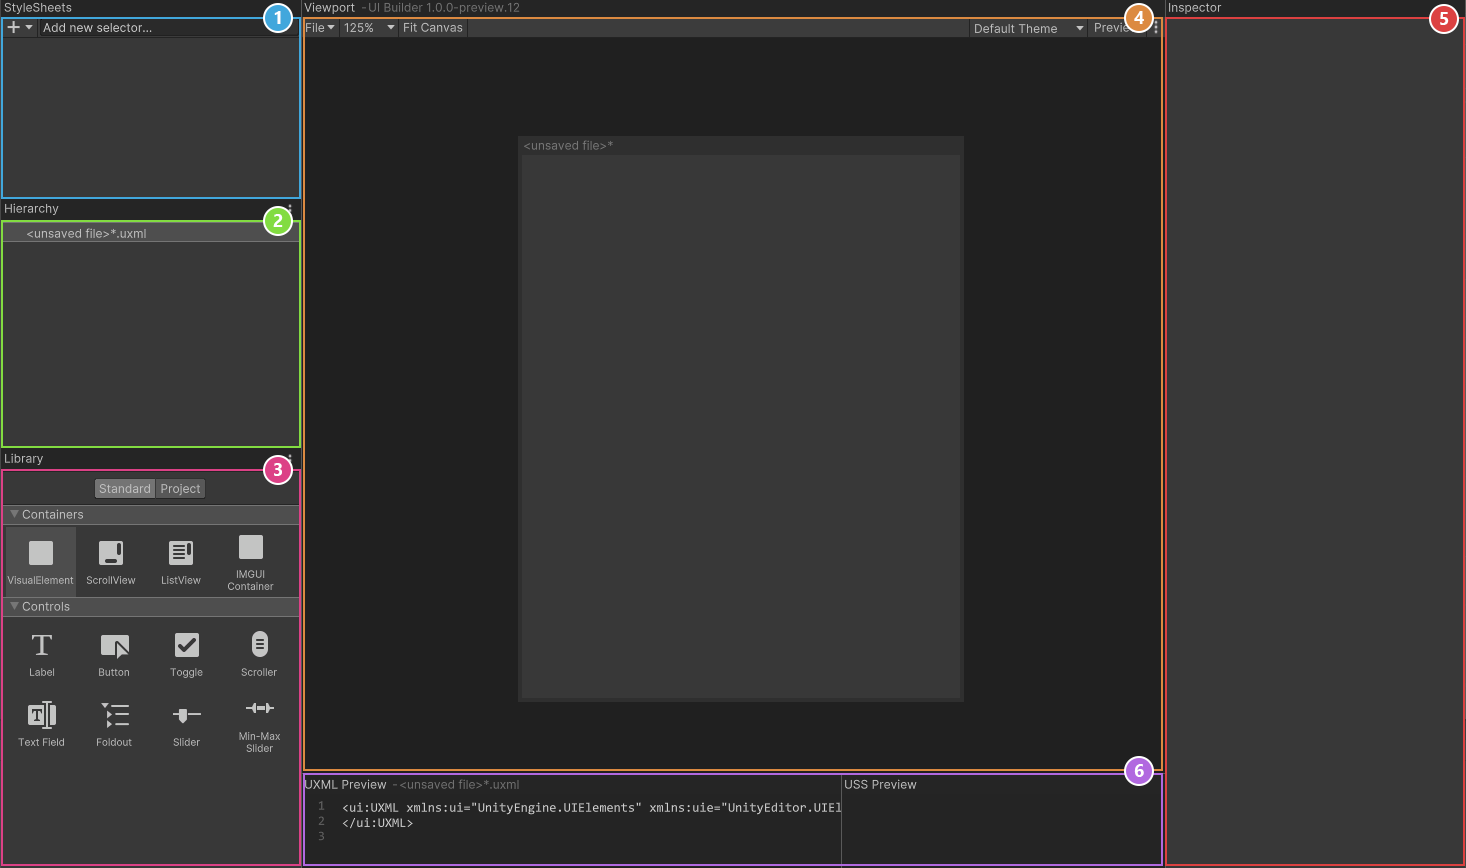
UI Builder is broken out into six different sections:
- StyleSheets: Manage the stylesheets and individual selectors that are used in this document. Style Sheets can be shared across multiple documents, thereby maximizing reusability.
- Hierarchy: A list of all elements that are within the document.
- Library: Contains a list of standard elements that can be instantiated. The Standard tab contains UI Documents from Unity. The Project tab contains UI Documents created in your project.
- Viewport: Visual of the UI document.
- Inspector: Contains modifiable attributes and style properties for the element currently selected in the hierarchy or StyleSheet sections.
- Code Preview: Displays the UXML and USS code that UI Builder is generating based on your decisions.
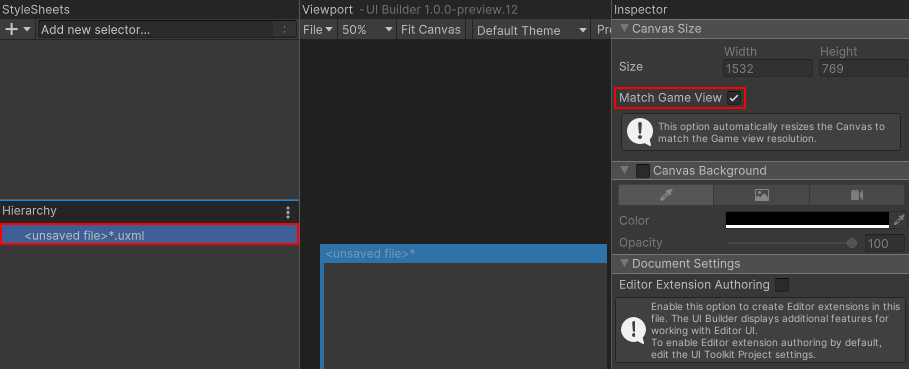
Now it’s time to create the Inventory UI. Inside UI Builder, click on the first item in the Hierarchy window, called «unsaved window».uxml. This pulls up the base properties. Check the Match Game View checkbox. This ensures that the UI scales with the screen.
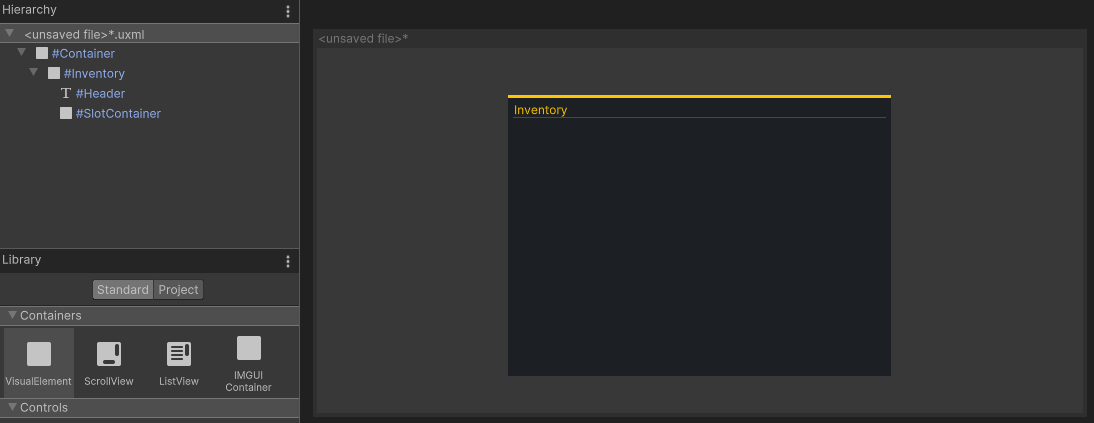
Next, Drag VisualElement from the library and drop it in the Hierarchy window. Click on it to pull up the properties. Set the following:
- Name: Container
- Flex > Grow is 1.
- Align > Align Items: center
- Align > Justify Content: center
Drag another VisualElement into the hierarchy window and make it a child of the Container. Set the following properties:
- Name: Inventory
- Flex > Grow is 1
- Size > Width & Height: 50% and 75%
- Size > Max > Width & Height: 50% and 75%
- Margin & Padding > Padding: 10px
- Background > Color: #1C2024
- Border > Color > Top: #FFC500
- Border > Width > Top: 5
Add a Label control as a child of Inventory. Set the following properties:
- Name: Header
- Text: Inventory
- Text > Size: 24
- Text > Color: #FFC500
- Margin & Padding > Margin > Bottom >: 10px
- Border > Color > Bottom: #404A52
- Border > Width > Bottom: 1
Add a VisualElement control as a child of Inventory. Set the following properties:
- Name: SlotContainer
- Flex > Grow is 1.
- Flex > Direction: Row
- Flex > Wrap: Wrap
- Align > Justify Content: center
Save your UXML document by going to File > Save As at the top of the Viewport section and name it Inventory. You should now have a window that looks like this:
The layout engine that UI Toolkit uses is the open source project called Yoga, which implements a subset of Flexbox. Flexbox is an HTML/CSS based layout system. A useful guide to Flexbox can be found here.